
137 lines
4.3 KiB
Markdown
137 lines
4.3 KiB
Markdown
|
|
[tocstart]: # (toc start)
|
|
|
|
* [U8g2 Install Instructions for Atmel Studio 7](#u8g2-install-instructions-for-atmel-studio-7)
|
|
* [Open Atmel Studio 7](#open-atmel-studio-7)
|
|
* [Create Solution](#create-solution)
|
|
* [Select Target Device](#select-target-device)
|
|
* [Assign main.c](#assign-mainc)
|
|
* [Open Project Properties](#open-project-properties)
|
|
* [Add Existing Item](#add-existing-item)
|
|
* [Add U8g2 ](#add-u8g2-)
|
|
* [Add Include Path](#add-include-path)
|
|
* [Add Clock Speed](#add-clock-speed)
|
|
* [Build](#build)
|
|
* [AVR mkII ](#avr-mkii-)
|
|
* [Open Programming Tool](#open-programming-tool)
|
|
* [Prepare Download](#prepare-download)
|
|
* [Execute Download](#execute-download)
|
|
* [Result](#result)
|
|
|
|
[tocend]: # (toc end)
|
|
|
|
# U8g2 Install Instructions for Atmel Studio 7
|
|
|
|
This is a step by step instruction for use of U8g2 with Atmel Studio 7.
|
|
|
|
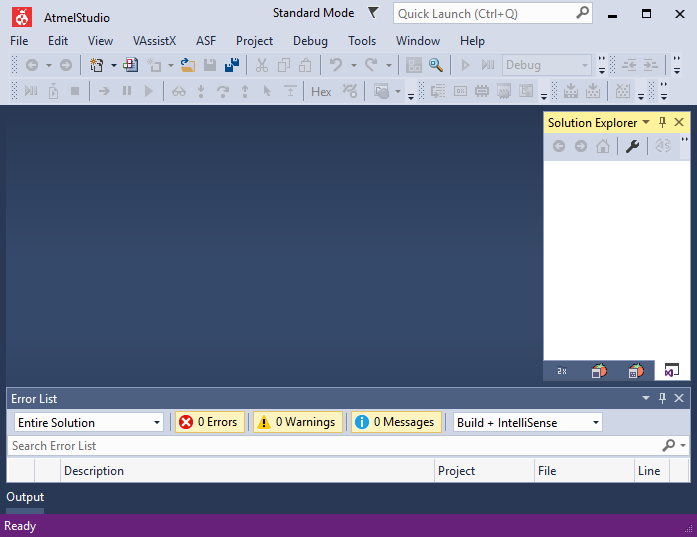
## Open Atmel Studio 7
|
|
|
|
|
|
|
|
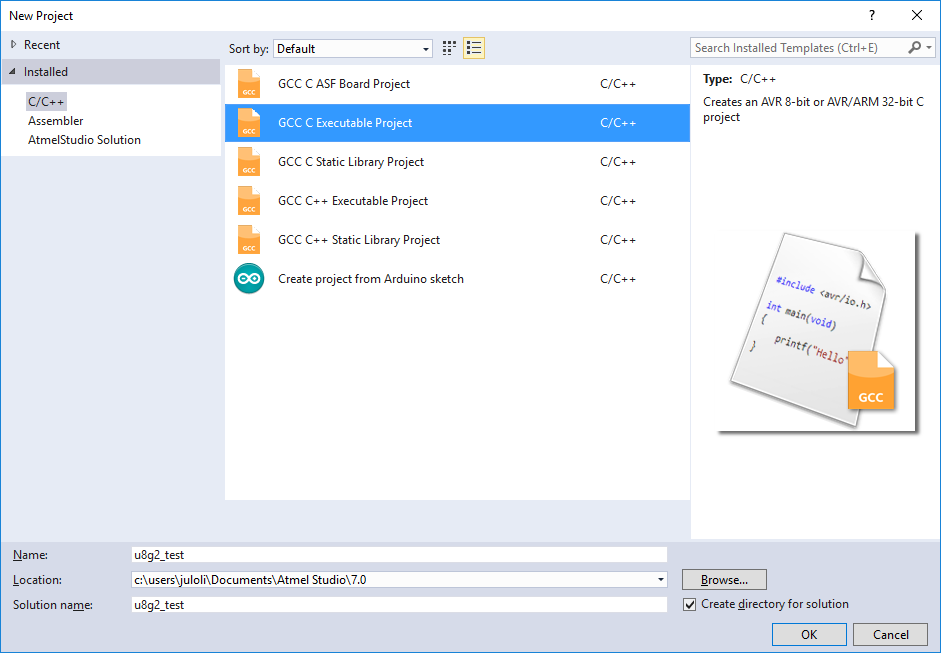
## Create Solution
|
|
* Create a new gcc c executable project
|
|
* Enter a project "Name"
|
|
* Enter a "Solution Name"
|
|
|
|
|
|
|
|
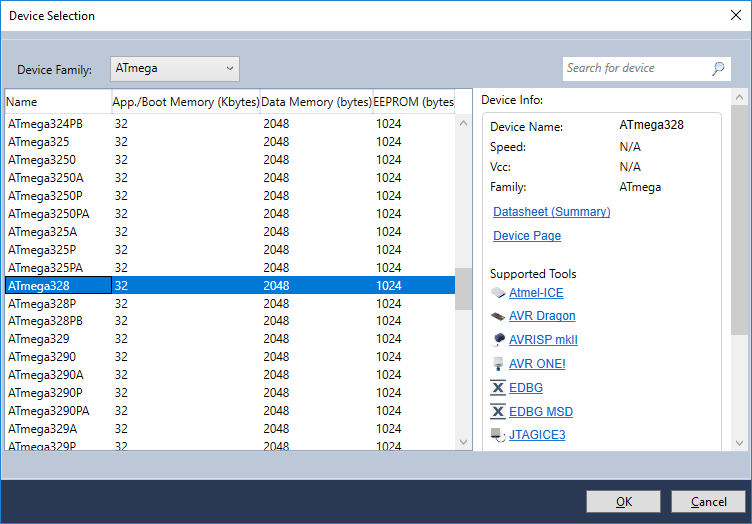
## Select Target Device
|
|
|
|
|
|
|
|
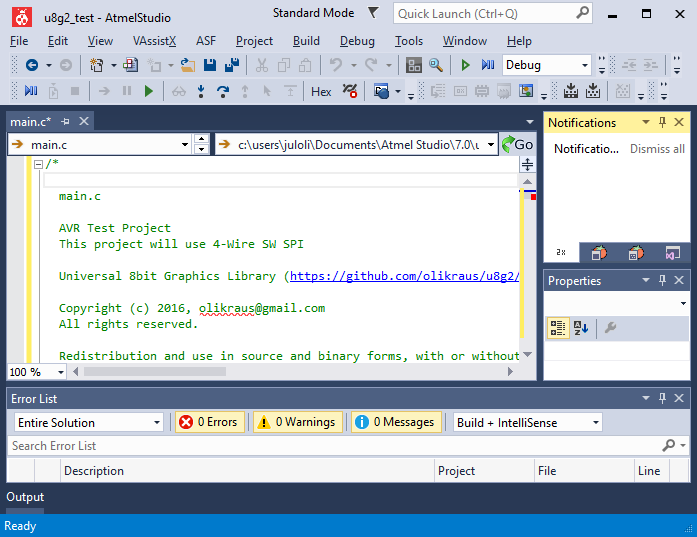
## Assign main.c
|
|
|
|
A template main.c will be created as part of the new solution.
|
|
Replace the content of this main.c with the content from here:
|
|
|
|
https://github.com/olikraus/u8g2/blob/master/sys/avr/as7/main.c
|
|
|
|
This example code is valid for a SPI display and will implement
|
|
software emulated SPI.
|
|
|
|
* Change the pin numbers according to your project
|
|
* Change the setup procedure according to your display (select from here https://github.com/olikraus/u8g2/wiki/u8g2setupc)
|
|
|
|
|
|
|
|
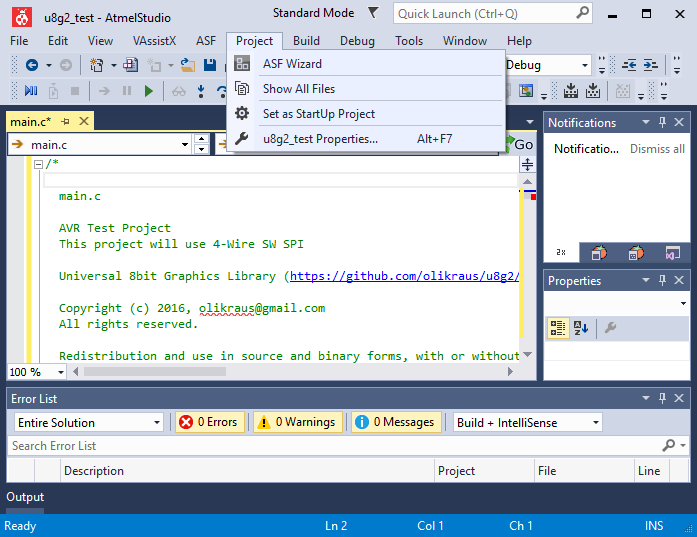
## Open Project Properties
|
|
|
|
Menu "Project", Submenu "u8g2_test Properties"
|
|
|
|
|
|
|
|
|
|
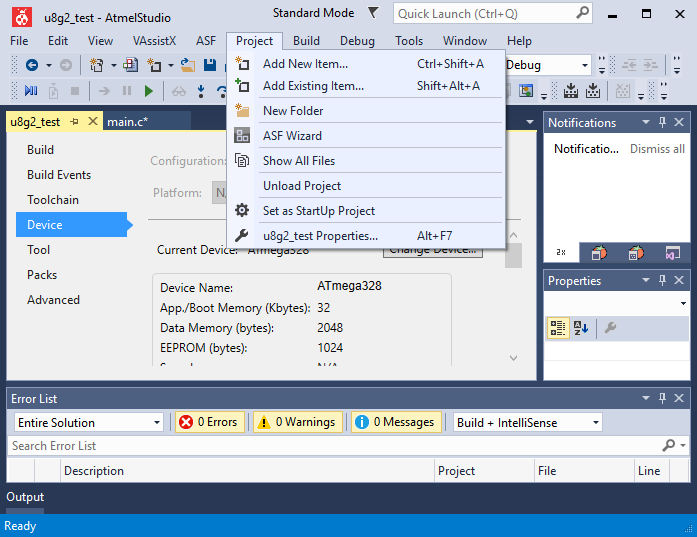
## Add Existing Item
|
|
|
|
Menu "Project", Submenu "Add Existing Item..."
|
|
|
|
|
|
|
|
## Add U8g2
|
|
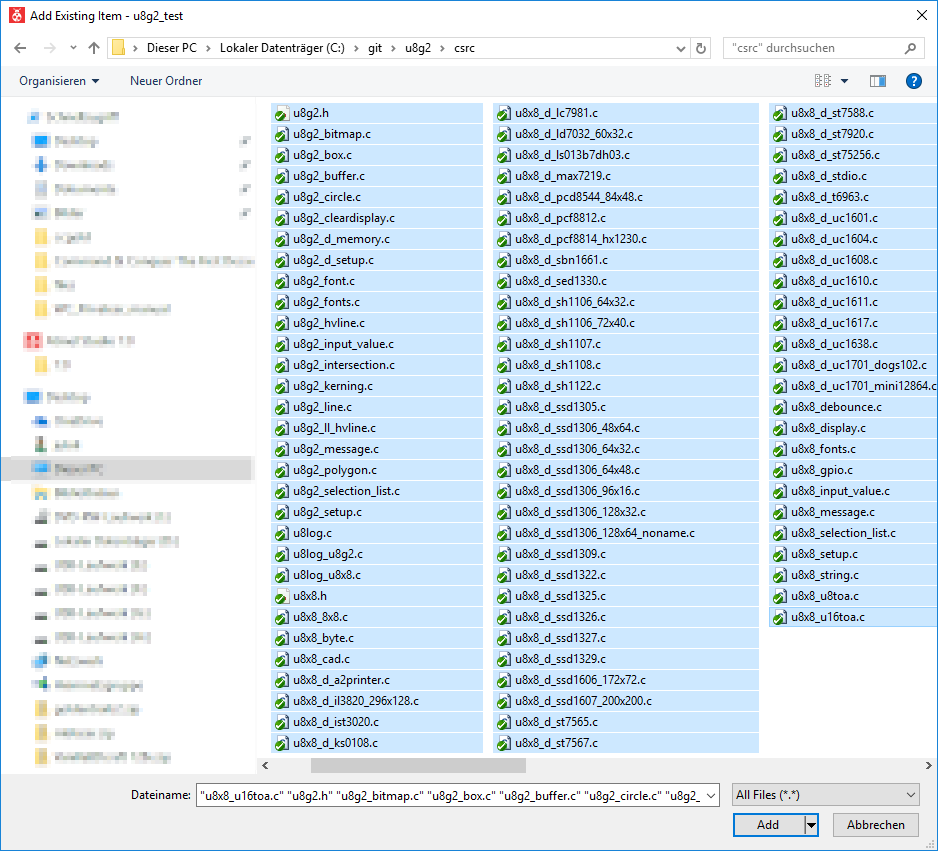
* Download the u8g2 master zip file: https://github.com/olikraus/u8g2/archive/master.zip
|
|
* Unzip this file and locate the "csrc" folder
|
|
* Mark all files in "csrc" folder
|
|
* Add the selected items (press "Add")
|
|
|
|
|
|
|
|
## Add Include Path
|
|
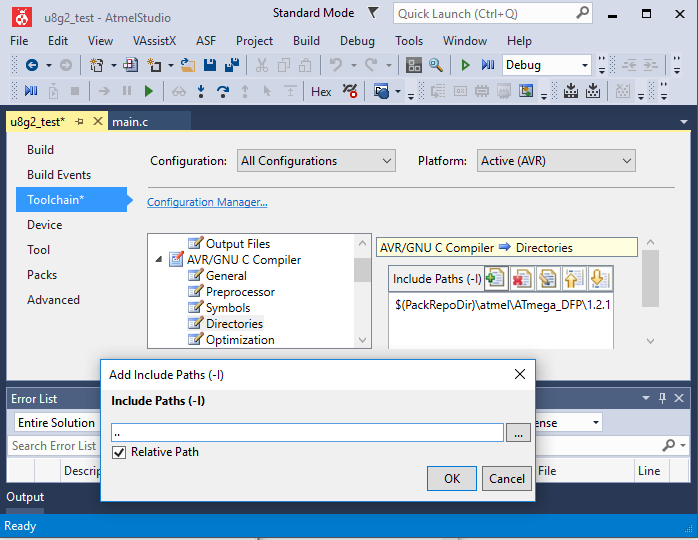
1. Select the project
|
|
2. Locate Toolchain tab
|
|
3. Select "All Configurations"
|
|
4. Select AVR/GNU C Compiler/Directories
|
|
5. Press the green plus icon
|
|
6. Add ".." as relative include path
|
|
7. Press "OK".
|
|
|
|
|
|
|
|
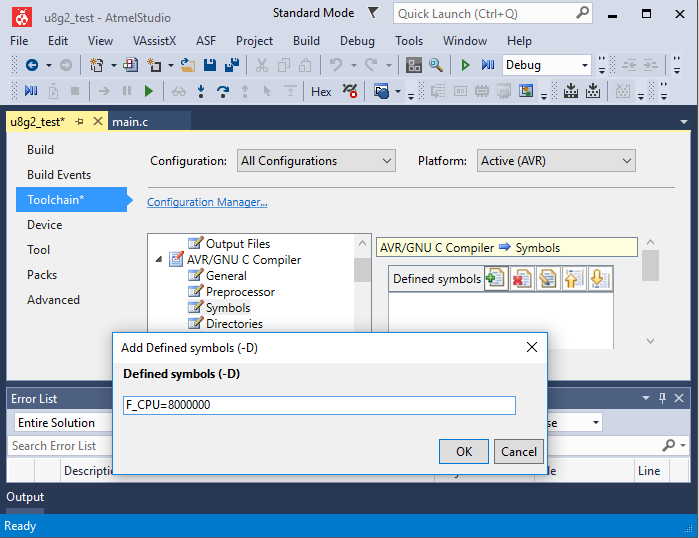
## Add Clock Speed
|
|
1. Select the project
|
|
2. Locate Toolchain tab
|
|
3. Select "All Configurations"
|
|
4. Select AVR/GNU C Compiler/Symbols
|
|
5. Press the green plus icon
|
|
6. Add the target frequency of your controller (here: "F_CPU=8000000")
|
|
7. Press "OK".
|
|
|
|
|
|
|
|
## Build
|
|
|
|
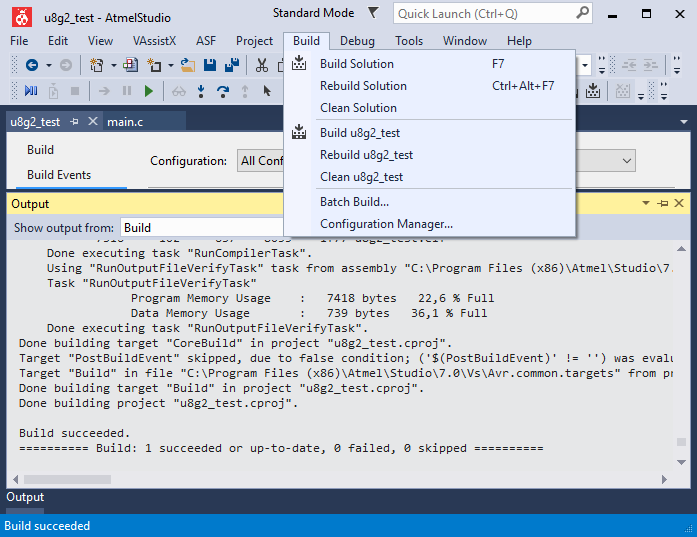
Build the complete project: Menu "Build", Submenu "Build Solution"
|
|
|
|
|
|
|
|
## AVR mkII
|
|
|
|
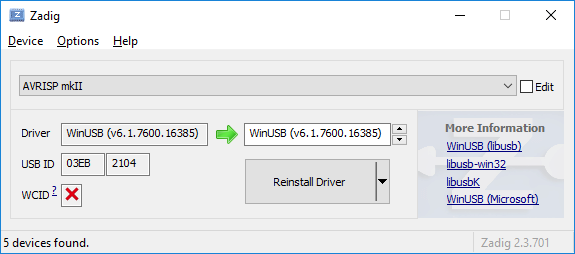
On my own Windows 10 environment, it was required to install a different usb driver for the AVRISP mkII.
|
|
Download Zadig from here: https://zadig.akeo.ie
|
|
|
|
|
|
|
|
## Open Programming Tool
|
|
|
|
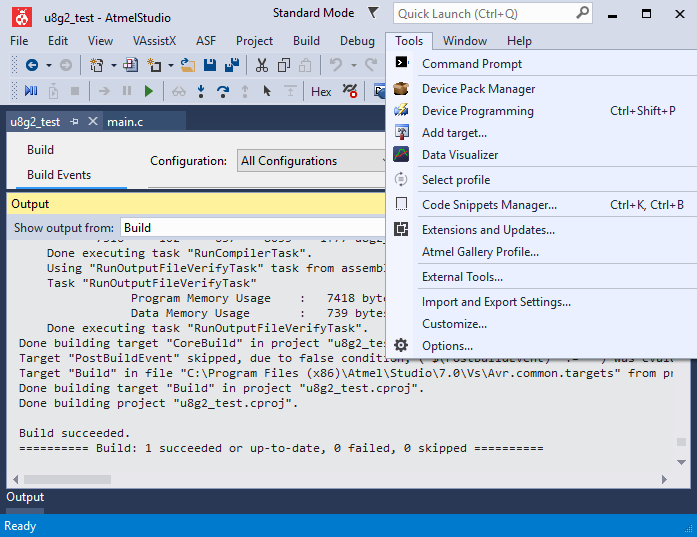
Open the Device Programming dialog from the "Tools" menu.
|
|
|
|
|
|
|
|
## Prepare Download
|
|
|
|
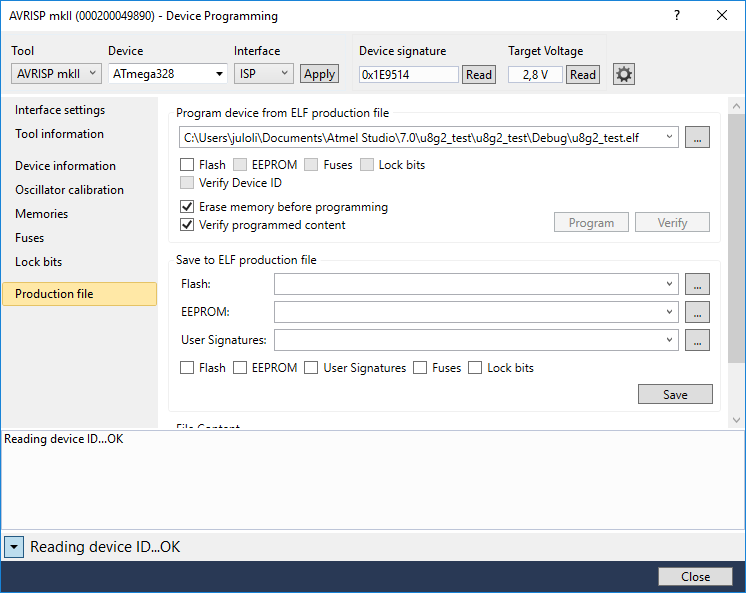
1. Select your ISP tool in under "Tool".
|
|
2. Select the correct target device and interface. Press "Apply" button.
|
|
3. Read the device signature from your target controller by pressing the "Read" button.
|
|
4. Goto "Production file" tab and select the generated .elf file as a "production file"
|
|
|
|
|
|
|
|
## Execute Download
|
|
|
|
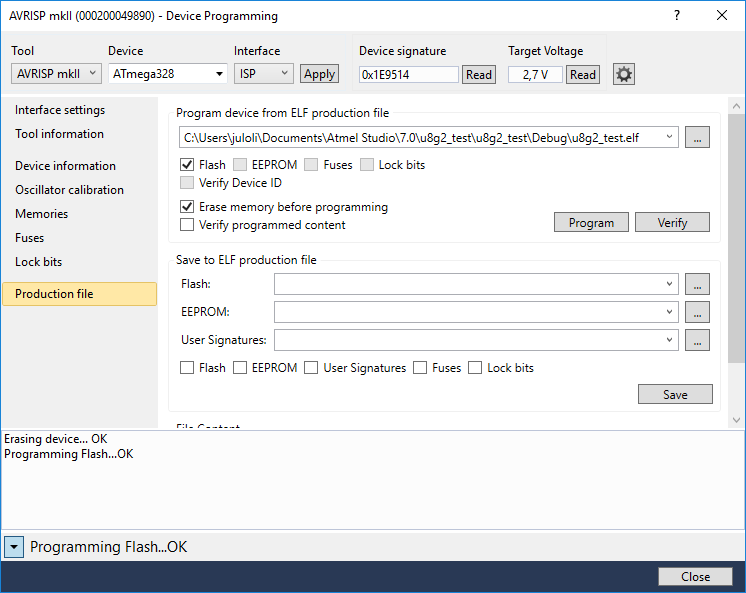
Check the "Flash" checkbox and press the "Program" button.
|
|
|
|
|
|
|
|
## Result
|
|
|
|

|